Five Standing Yoga Positions: Chair Yoga to Boost Your Balance and Strength
Seated Chair yoga poses are most definitely beneficial in so many powerful ways. But today, I wanted to introduce 5 standing yoga positions using the chair for support that are beneficial for balance and strengthening, and that are perfect for true beginners. There are many variations of these poses, but I am going to stick with the basics and ones that are good for beginners who need some support from the chair- although I will add in a couple of ways to gently up the challenge. You will need a sturdy chair -or these can all be practiced with the support of a sturdy kitchen counter.
This post contains affiliate links. I earn from qualifying purchases. This means that I may earn a commission should you choose to sign up for a program or make a purchase using my link. This is at no extra cost to you. I only recommend products that I truly believe are helpful. See our Privacy Policy and Disclosures page
If you are interested in reading more about the research on how yoga and tai chi can help reduce falls, take a look at this study: Comparative impacts of Tai Chi, balance training, and a specifically designed yoga program on balance in older fallers
You may choose to be barefoot or wearing your regular shoes. Just ensure that if you are wearing socks, you will not slip on any slick surfaces. I will show one pose modification using a yoga block, but that is not necessary- you can do it without or use a thick book. As always, do what is right for you and be mindful of your balance and strength and honor where you are today. Keep reading for 5 chair yoga positions practiced standing for beginners to help improve strength and balance.
1. Mountain Pose
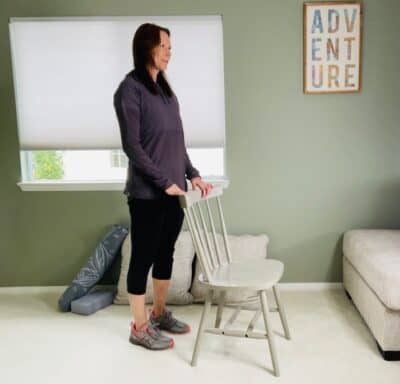
It may not seem as if we are doing a whole lot here, but we most definitely are. We begin in Mountain Pose by checking in with our posture and alignment. This is our foundation for all other standing poses. We will pay attention to our feet as they ground us. We will engage our core as we lengthen from the base of the spine to the crown of the head. Take a moment here to check in with your breathing. Gently contract the thighs to feel your quadriceps muscles. Work to find stability in the hips.
This standing yoga pose helps us to find our center and encourages a sense of grounding- these are things we need to maintain balance and help prevent falls. This sense of checking in with our posture is a good “exercise” to do throughout the day We can challenge our stable base and add on by raising one arm towards the sky while we support our balance with the other hand:
- Begin by standing to the side or back of your chair-hold the chair as needed for support
- Place your feet hip distance apart- or wherever feels comfortable
- Feet are parallel- ground down evenly through all four corners of your feet
- Lengthen the spine as you root through the feet and engage the core -top of the head reaches toward the sky
- Energize the legs by slightly contracting the thigh muscles and elongate the low back by lengthening the tailbone down
- Shoulders stay down and away from the ears, muscles in the face are relaxed, and the chin is parallel to the ground
- Stay here for 3-5 breaths-don’t rush this
Challenge: If you wish, release one hand to your side. Inhale as you raise the hand up towards the sky-only as high as is comfortable. Stay here for one breath as you lengthen through the side body. Exhale to release the arm back by your side. Continue as desired for 3-5 reps and repeat on the other side. Option to lift your gaze up as you raise the hand towards the sky (don’t drop the head back, only move the eyes).
2. Heel and Toe Raises
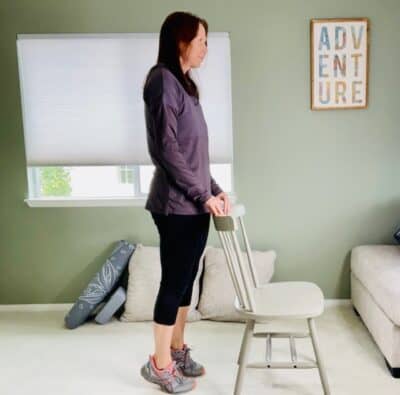
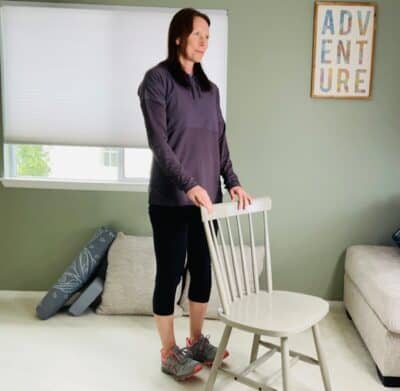
These standing yoga positions are great movements to strengthen the muscles in the foot and ankle, as well as the calves and shins- important muscles for balance, walking, and circulation. This is also a great functional exercise you can add to your day. If you find yourself standing at the kitchen counter for a lengthy period of time, add in a few of these to help with your circulation. Continue to be mindful of your posture and alignment- do not rush.
- Begin in your Mountain Pose with a long spine
- Gently hold the chair or counter for support as needed
- Inhale to raise the heels up off the floor as you rise up onto the balls of the feet
- Exhale to gently lower the heels back down
- You may choose to hold the heels up off the floor for 2-3 breaths
- Repeat 5-10 times as desired
- Keeping the heels on the floor, inhale as you lift the toes up-this may be a small movement, try to keep the body upright and minimize swaying
- Exhale as you lower the toes back to the ground
- You may choose to hold the toes up off the floor for 2-3 breaths
- Repeat 5-10 times as desired
Challenge– Alternate raising the toes and then the heels- keep the body from swaying by focusing on the feet/ankles – move slowly and with control as you inhale to lift and exhale to lower.
3. High Lunge
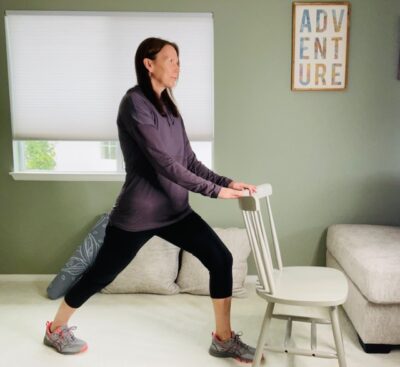
This is a great pose for building strength in the lower body as we come into a modified lunge. You can make it as big or small as small as you need. Only step the foot back as far as is comfortable (your heel may or may not reach the ground). We still get core engagement as we work to maintain our upright posture. We can add a balance challenge, if we choose to, by alternating right to left.
- Begin in your Mountain Pose facing the back of the chair
- Gently hold the chair for support as you inhale to lengthen the spine
- Exhale as you step one foot back behind you (only as far as is comfortable) and gently bend the front knee into your lunge-knee in line with the ankle (it may only be a small bend)
- Put as much or as little of a bend in the posterior knee as needed-reach the heel towards the floor as you feel the stretch in the calf (only as much as is comfortable)
- Work to maintain the shoulders down, the spine long, and the chest broad
- Take 2-3 breaths here as desired
- On an exhale, if the back heel is not already raised, gently rise up onto the ball of the foot and step the back foot up to meet the front foot
- Repeat 2-3 times or as desired
- Repeat on the other side
Challenge– Move with your breath as you alternate right to left- being sure to focus on your posture and the breath as you move.
4. Tree Pose
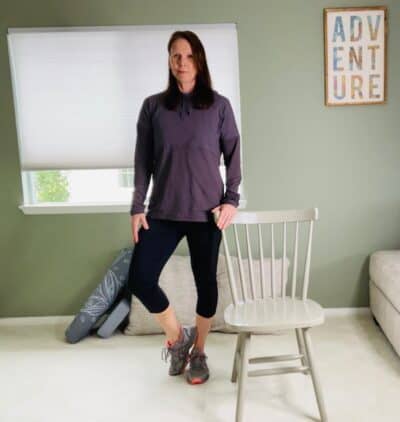
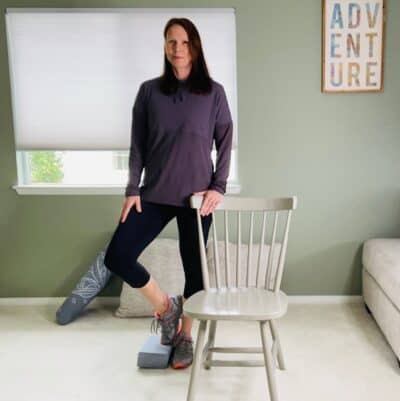
Tree pose is one of many great standing yoga positions for building strength, balance, and focus- all important when it comes to fall prevention. There are many variations that we can do with this pose, however for the theme of poses for beginners, we will keep the foot low and use the chair for support. If you would like to practice lifting the foot up off the ground- you can try resting it on a yoga block for support as you work to gain strength and balance.
Although it may seem like the leg with the foot lifted is the main focus- don’t forget the stabilizing leg is working hard. Root through the stabilizing foot and engage all the muscles in the leg and pelvis. Work to keep the pelvis level. Be aware that in the photo I am standing to the side so that my feet are more visible, but you can stand behind the chair and hold with both hands.
- Begin standing in your Mountain Pose, hold the back of the chair gently for support
- “Root” down through one leg and inhale to a long spine
- On an exhale, lift the opposite heel of the floor and come to the ball of the foot
- Externally rotate the hip as you open the knee to the side and rest the sole of the foot against the supporting ankle
- You may wish to lift the foot up higher and place it on the outer edge of the opposite calf-or on a yoga block or thick book as shown
- Stay here for 2-5 breaths as desired as you focus on your balance and engaging the core
- Hug the stabilizing hip into the mid line as you engage the hip muscles to keep the pelvis level
- Exhale to gently release the foot back down
- Repeat 2-3 times as desired
- Repeat on the other side
- Notice how you feel
Challenge- You may choose to gently raise one arm up towards the sky as you “grow your tree”- play around with the arms. You can bring one hand to the heart center, the hip, or out to the side- whatever feels right.
You may also be interested in checking out Tree Pose- 5 Ways To Practice for more variations.
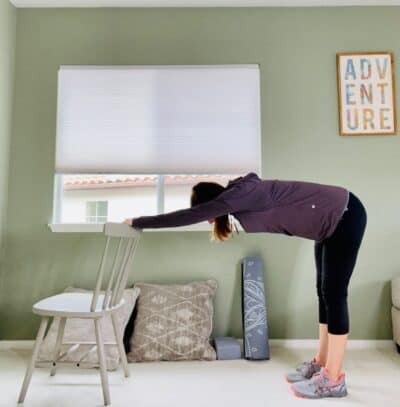
5. Upward Facing Dog to Downward Facing Dog
This pose serves to stretch the shoulders, upper back, and hamstrings- but it also requires us to engage the core and bring some mindfulness to our alignment. We will perform this at the back of the chair, however you can practice it with the hands on the seat for a deeper stretch. We can add more of a strength and balance challenge by flowing between Upward and Downward Facing Dog.
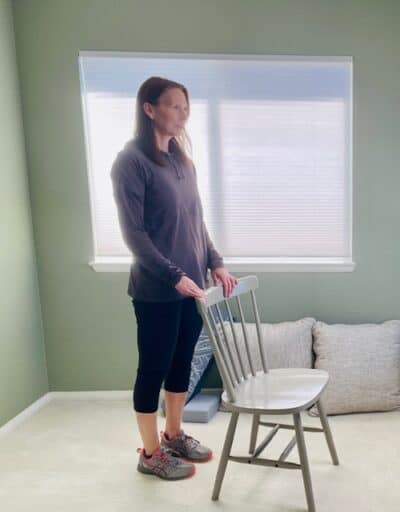
- Begin by standing next to the back of your chair in your Mountain Pose with a long spine
- Root down through both feet evenly and place your hands on the top of the chair
- Check in with your posture and your breathing here
- Take an inhale as you arch the back and open through the chest- neck stays neutral as you gaze forward
- Exhale back to neutral
- Repeat 2-3 times or as desired
- Inhale to lengthen the spine
- On an exhale, step back, stretching the shoulders as you hinge at the hips and come into an L shape in your Downward Dog
- Only step back as far as is comfortable- do not strain the shoulders. Maintain a long spine. If you are rounding through the upper back, stay closer to the back of the chair-it may not look like an L (just maintain your hip hinge)
- Keep the core engaged (think of bringing the front body in to meet the back body) and distribute your weight evenly through the feet and both hands
- Stay here for 2-3 breaths or as desired
- Exhale as you step forward and return to neutral
- Repeat 2-3 times or as desired
Challenge– Move with the breath as you alternate back and forth between Upward Facing Dog and Downward Facing Dog. Do not rush, maintain a long spine, and feel free to stay in each pose for as long as you would like.
Want More?
Take a look at this quick video demonstration if you would like a visual (Note: there is no audio, just a visual)-5 Standing Chair Yoga Poses for Beginners
If you have difficulty finding proper footwear for any number of medical or other issues, you may be interested in taking a look at ICS Shoes. They specialize in comfort, extra wide, diabetic, and orthopedic shoes. Here is an example of a women’s athletic shoe: Dr. Comfort Shoe Refresh-X
If you would like some seated chair yoga videos, visit The Peaceful Chair YouTube Channel
If you are new to chair yoga, you may be interested in the 7 Days of Chair Yoga Challenge for a gentle introduction to movement (Seated Chair Yoga)
You may also be interested in taking a look at Chair Yoga For Mobility
Visit The Peaceful Chair Etsy Shop for Health and Wellness related printable pages and more for all stages of life
And, I invite you to sign up for the Monthly Email Newsletter to keep up to date on the latest blog posts and videos
Namaste!
Disclaimer: The Peaceful Chair and thepeacefulchair.com strongly recommends that you consult with your physician before starting this or any exercise program.The information provided on this website is for informational purposes only and is not to be used in place of medical advice or information from your healthcare provider. Neither The Peaceful Chair, the peacefulchair.com, nor any of its contributors shall be held liable for any improper or incorrect use of the information described and/or contained herein and assumes no responsibility for anyone’s use of the information contained in any links, videos, or any content on this website.
Leave A Comment